
Create a Wallet
In this article we will discuss how to open a Metamask Crypto Wallet on PC.
Content Summary
What is Metamask
How to Open the Metamask Wallet
How to Include Additional Networks on Metamask
Key Information
What is Metamask?
Metamask is a digital crypto wallet, in essence both an electronic holding method for your cryptocurrencies, and a gateway to Decentralised Finance (DeFi).
Given it’s release date in 2016, it is one of the oldest wallets offering DeFi access, and due to this, also one of the most advanced. Given its advanced nature, the complexity level of MetaMask however does mean it can be difficult to navigate initially.
Metamask is natively built around Ethereum networks ERC-20 token, but due to its advanced features, almost any blockchain network can be incorporated into this.
Metamask is available on PC, Apple IOS, and Android Google Play Store. Here we will be covering how to open the Wallet within Google Chrome on PC.
How to Open a Metamask Wallet
Step 1 - Download the Metamask Browser Plug-In
The first stage of opening a Metamask wallet on PC is to download the browser plug-in, which can be located here.
The add-on can also be found on multiple other browsers, such as Brave, FireFox, and Microsoft Edge.
All Metamask plug-ins can be found within their Downloads page here. For the purpose of this article we will be covering Google Chrome, however the same principles apply for the other browsers.
Step 2 - Creating a New Account
Once the browser plug-in has been downloaded, install and open this. You should then see the below page:

As you will be opening a new account, press ‘Create a Wallet’ to continue. Once done, you will need to accept or decline Metamask’s data processing, and then create a password to access your wallet from your PC, as per the below:
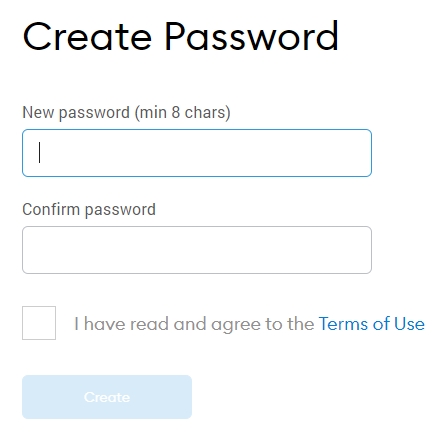
Once you’ve input a password and agreed to the Terms of Use, you will then be required to watch a short video on protecting your Seed Phrase.
Step 3 - Secret Recovery Phrase (Seed Phrase)
Once you’ve watched the video, you will then be able to proceed to the next page, which will show you your 12-word cryptographic Seed Phrase, also known as the Secret Recovery Phrase for Metamask.
It is of the highest importance that this is remembered and kept in a secure, offline location. Loss of your Seed Phrase can mean the potential loss of your wallet.
This means you should write this down on a piece of paper stored securely.
You should also NEVER provide your Seed Phrase to anyone else, this is your personal key to your wallet. Providing this to anyone else, or losing this, could result in someone accessing your wallet and draining this.
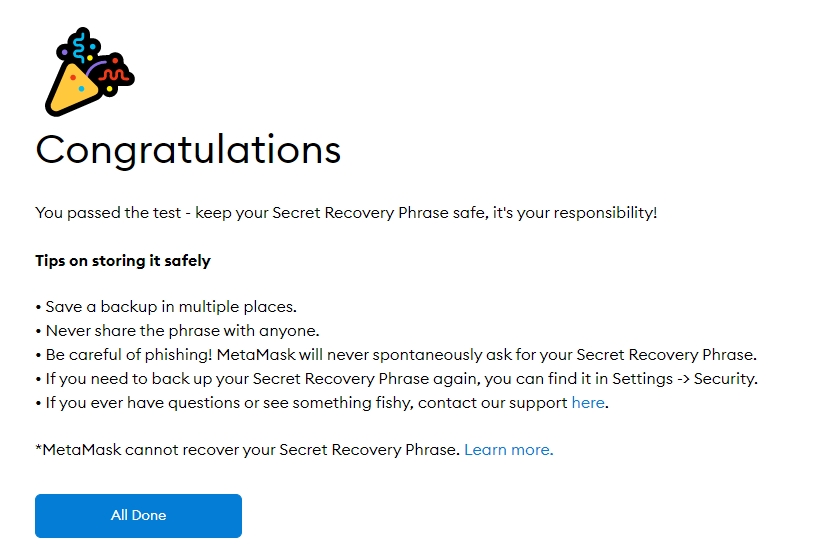
After taking note of this, proceed to the next page, in which you will be required to enter your Seed Phrase in the correct order to finalise the wallet opening. Once done, you will then see the below finalisation, including tips on keeping your wallet safe:
Step 4 - Using Your Wallet
After finalising the set-up, you will then see the main page of your wallet:
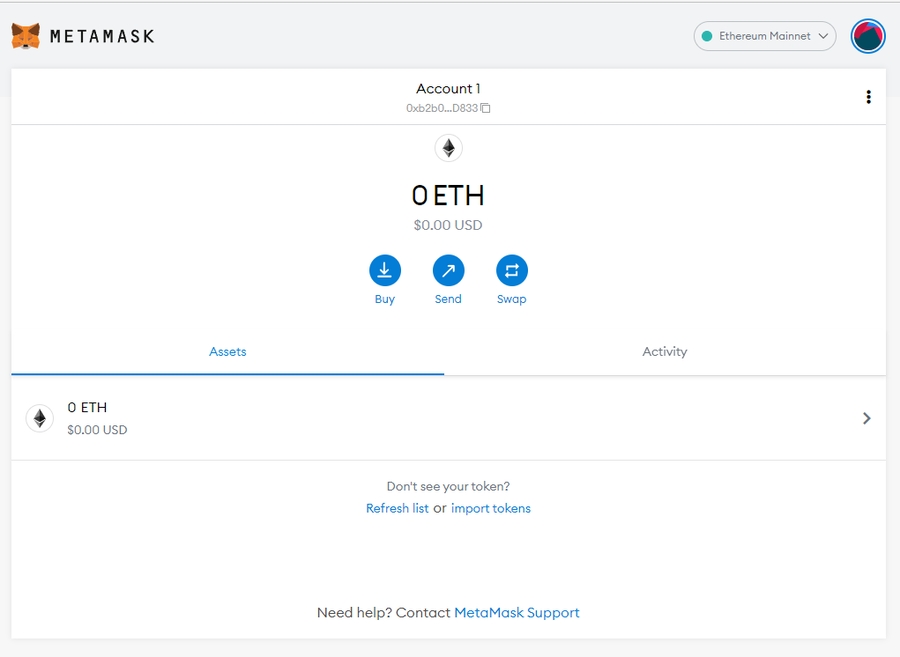
Within the section named ‘Account 1’, below this you will see your Wallet Address. This is absolutely key when transferring funds to your wallet - an error in your Wallet Address can result in funds being transferred to another wallet. As such, always use the ‘Copy to Clipboard’ function and ensure you paste this, rather than manually inputting this.
Given Metamask will always open using the Ethereum blockchain to begin, we will now need to transition this to the Binance Smart Chain.
How to Include Additional Networks on Metamask
When you're just starting out, there's a multitude of networks avaliable to choose from, we recommend starting out by experimenting on the Binance Smart Chain. A low cost network which you can use to learn DeFi and Crypto Trading.
Step 1 - Open Metamask Settings
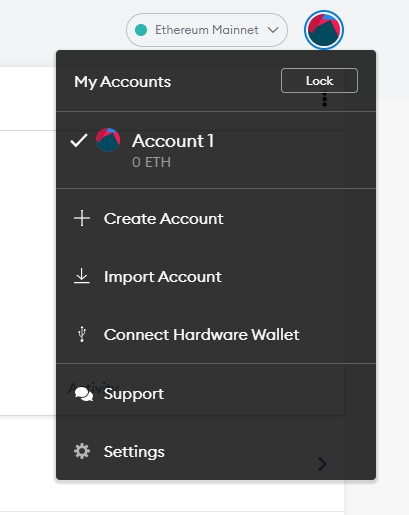
The first stage of including a new blockchain is to open the Metamask settings. This is done by pressing your account icon at the top right. From the dropdown box, press ‘Settings’.
Step 2 - Networks Menu
Once within the settings page, press the ‘Networks’ menu on the left hand side, as per the below.

Press ‘Add Nerwork’ at the top-right hand side of the screen, which will then add a new network to the existing ‘Networks’ list:
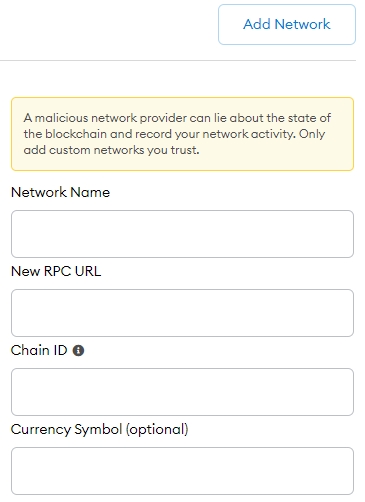
You will then need to input the details as per the below to access the Binance Smart Chain mainnet:
Network Name: Smart Chain New RPC URL: https://bsc-dataseed.binance.org/
ChainID: 56
Symbol: BNB
Block Explorer URL: https://bscscan.com
Once added, press ‘Save’ at the bottom right of the page, and close the Settings tab to move back to the main Wallet page.
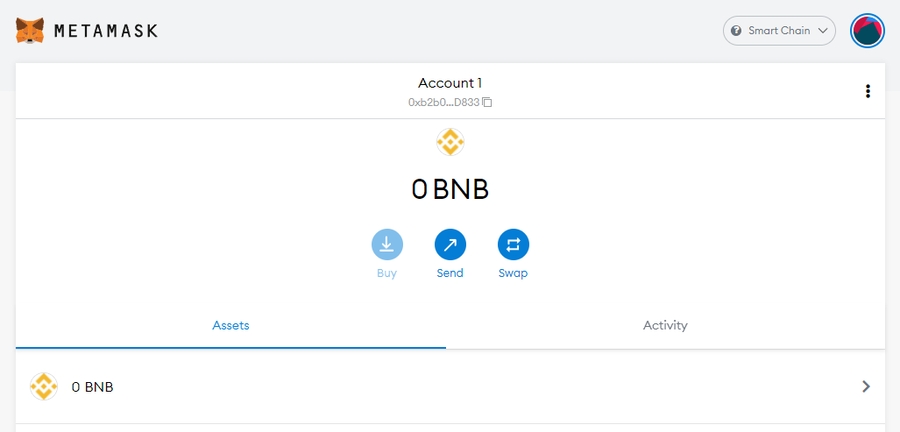
You’ll immediately notice now that your network has been changed to the newly input one, and ETH is no longer showing as the account balance, but BNB - as per the below:
You can add multiple different blockchain networks within Metamask, using the same process as the above. To find the details of whichever network you wish to input, a simple Google search will provide you the details you will need to input.
However, ensure care is taken, as inputting malicious details can result in access to your wallet. Check to make sure the details for the network are valid and correct before inputting these.
Key Information
It is important to always bear in mind the below:
Your Seed Phrase is the access to your wallet. Keep this as safe and secure as possible, and NEVER give this out to anyone. Requests for your Seed Phrase for any purpose should always be ignored.
It is essential to keep an amount of the native network token on your wallet account, as this is always used for transaction fees. An example being BNB (Smart Chain) for the Binance Smart Chain, or MATIC for the Polygon network.
Last updated